Our verdict of the Chuwi MiniBook 8:
The Chuwi MiniBook 8" does more than revive the netbook: it takes that form factor and packs a much more useful computer inside.

It turns out you all loved our first bundle of productivity cheat sheets so much that we’ve decided to put together a second bundle to help you become a productivity ninja!
This next set of printable cheat sheets covers shortcuts and commands for Google Chrome, as well as for your operating system of choice. Master just a few of these, and you’ll save a ton of time, reduce clicks, and streamline your repetitive workflows in no time!
You can download this new bundle completely free of charge today!

In this next collection, you’ll find cheat sheets for:
These cheat sheets are the perfect resource for you to print out for easy reference, or to share with your colleagues and friends.
Want in? Simply click here to download your free productivity cheat sheets from TradePub. You will have to complete a short form to access the bundle, but it’s well worth it!
Read the full article: Download Even More Productivity Cheat Sheets for FREE!
https://ift.tt/2ZBBzfa

Flickr now lets you order prints of photos directly from the site. The new feature is designed to take the pain out of ordering photo prints, allowing you to order photo prints in just a few clicks. And Flickr is offering a range of different prints.
As detailed in this post on the Flickr Blog, you can now order photo prints from Flickr. You can only order prints of your own photos, so there’s no option to browse your favorite photographers’ photo streams in the hope of finding a print for your bathroom.
To order photo prints from Flickr, first, log into your Flickr account. Then select Prints from the top navigation bar. From here, you can select the photo you want to print, and then choose the product style, size, and finish before adding it to the cart.
Big day today, launched the project my team has been working on for a long while now. https://t.co/9zOsQTmtcQ #printBoldly #flickr
— cabbey (@cabbey) August 28, 2019
You can order metal prints, which use aluminum sheets to create photographic wall art, paper prints, which range from 6x4s to larger pieces for framing, and canvas prints, which offer a classic look and are guaranteed to make a statement.
Flickr is giving credit to SmugMug for developing this feature. As a reminder, SmugMug acquired Flickr in 2018. To ensure the Prints look their best, Flickr is partnering with photo labs including Bay Photo, Loxley Colour, and White House Custom Colour.
This is a fantastic new feature from Flickr, and it’s quite surprising it hasn’t offered the option to order prints of your own photos until now. The obvious next step is to let you order prints of other people’s photos and to let you sell your own prints to other people.
If you want to order prints online but don’t want to use Flickr, here are the best sites for printing digital photos. You should also be sure to read our article explaining how to get high quality prints online before placing your order.
Image Credit: Jocelyn Durston/Flickr
Read the full article: You Can Now Order Photo Prints From Flickr
https://ift.tt/2zA4Qwb

With today’s cameras boasting more megapixels, you’re more likely to scale a photo down than enlarge it. But there are times when increasing the size of an image can really come in handy. Unfortunately, it can be tough to enlarge a picture without losing quality.
There are several ways to tackle this problem, and in this article we’ll describe two of the best ways to enlarge a picture without losing quality.

When you increase image size, you’re asking your computer to add information. Put succinctly, you’re telling it to blow up an image with losing detail, and to do this by “guessing” what a larger image would look like.
This means that you’re never going to get a perfect recreation of your photo at a larger size, because it’s a matter of format and software: some apps will be better at it than others, and some pictures will resize better than others. But they all have to make a guess.
The amount of guessing your computer does will vary on how much you want to increase the size of your image. The more you enlarge a picture, the more likely you are to see a degradation of quality. Understanding that upfront is important, and will help you pick the best pictures to modify. If you’ve used upscaling with home entertainment equipment, you’ll have a good idea of what we mean.

This is a commonly recommended method for seeing how much upscaling you can get away with when enlarging an image without losing quality. It works best if you’re not trying to scale your image to a specific size, but trying to blow up an image as large as you can without making it look bad. We’ll use this picture of magazines on a coffee table as an example.
This picture is currently 670 pixels wide. If you lean towards your monitor and squint, you can probably make out all of the text. Right now everything is pretty smooth and the image looks nice.
To enlarge the image, we’re going to take advantage of Resampling, which is the “guessing” part we were telling you about earlier. And we’re going to use Photoshop to do it. Here’s what happens when we scale up the image to a whopping 2000 pixels wide (just to show you what the program can do):

To resize this image in Photoshop, click on the top menu in the app and click Image > Image Size. Then adjust the height and width in the Image Size dialog box. Also, make sure to have Resampling turned on, with Bicubic Smoother as your preset.
As you can see, Photoshop does an amazing job smoothing out this image from 670 pixels to 2000 pixels. Photoshop CC has really improved in leaps and bounds over the years, and while this image is definitely blurry around the edges and the text is not as sharp, you can still make out most of it with ease.
However, it’s easy to imagine some details in a different image becoming indistinguishable. So instead of making the jump all the way to 2000 pixels, we’ll just add 10 percent to the original image size.
To resample to 10 percent larger in Photoshop, go to Image > Image Size. Then—instead of adjusting the width and height by pixels—choose Percent. Type 110% and make sure Resampling: Bicubic Smoother is still turned on.

Here’s what the image looks like when you increase it by 10 percent:

As you can see, it still looks pretty clear. To experiment with this, keep on bumping up your image in Photoshop by 10 percent at a time until you start to see some graininess. As we’re trying to make small steps up to enlarge a picture as much as possible while still maintaining quality of the image itself, seeing graininess is your cue to stop.
If you’re going to use this method, it’s very important to make sure that Resample is enabled in your photo-editing app. Here’s what that looks like in the Image Size dialog box in Photoshop:

You can also use an app like Pixelmator or GIMP to resample an image. Both are good and will offer a similar option. If you’re lucky, you’ll be able to choose the interpolation algorithm (that is, the computer’s “guessing” method) for the scaling. When you’re scaling up, the Bicubic Smoother option is a good one.

Because so many people find themselves in need of larger photos, there are actually a number of apps designed to specifically enlarge an image without losing quality.
A Sharper Scaling, for example, is a free Windows app that promises better upscaling than Photoshop. The results posted on its website are quite impressive. This app does one thing and one thing only—and that’s increasing image size—but it’s free, so it’s definitely worth downloading.
Free equivalents for macOS are less plentiful, but that doesn’t mean you don’t have options. Waifu2x is a solid online option. Waifu has shown some very impressive results with zooming in on an anime picture and making it clear, although it can be slightly unpredictable with photos.
At the end of the day, you may just have to try out a few of these options to see which app works best to enlarge your picture. Above is an example of what Waifu can do for our image, compared with Photoshop side-by-side.
Even without zooming in on the picture to make it clear, you can probably see that the image from Waifu is very comparable to the latest version of Photoshop. The site’s use of deep convolutional neural networks (what are neural networks?) makes it very adept in the “guessing” that we mentioned earlier, and the result is significantly cleaner upscaled photos.
If Waifu isn’t working well for you, though, you can try Online Image Enlarger, Simple Image Resizer, or Rsizr.
These two methods of increasing image size are probably your best bets when you want to enlarge a picture without losing quality. Neither is perfect, but because of the constraints of technology they’re about the best we can do.
Fortunately, most phones and cameras now take very high-resolution photos, so you shouldn’t have to deal with this too often. You can also save high-resolution images in Photoshop. Just remember to always work from the largest original image that you can.
Image Credit: fractal-an/Shutterstock
Read the full article: How to Digitally Enlarge a Picture Without Losing Quality
https://ift.tt/2Pq1l69

Historically, you downloaded Windows software through an EXE file from its official website or a third-party download site (called a desktop app). But starting in Windows 8 and today with Windows 10, you also have the option of downloading apps from the Microsoft Store (known as store apps).
Many apps are available as both traditional desktop apps and modern Store apps. Given the choice, which should you download? We’ll take a look and try to answer that question.

Microsoft included its new app marketplace, called the Windows Store, with Windows 8. At the time, these “Metro apps” were only available in full-screen and many people ignored them.
This marketplace was carried into Windows 10 and eventually renamed the Microsoft Store (not to be confused with brick-and-mortar Microsoft stores). In addition to apps, the Microsoft Store carries games, movies, TV shows, and Edge extensions. Now, the lines between app types are blurred, as Store apps run in a window just like traditional desktop programs.
Check out our overview of the Microsoft Store for more info, if you’re new to it.
For some time, Windows was the only major platform not to offer an official marketplace for apps. Android has Google Play, macOS and iOS have the App Store, and Linux has several storefront repositories. Longtime Windows users may wonder why Microsoft even bothered to release an app store like this.
From the company’s perspective, this was mainly for two reasons: uniformity across platforms, and security of the OS.
As you might remember, Microsoft pushed the new Universal Windows Platform (UWP) apps (called Metro apps during Windows 8) pretty hard. The idea was to offer apps that worked on desktop Windows as well as Windows Phone.
Nowadays, even after the collapse of Windows 10 Mobile, apps on the Store often run across Windows 10, Xbox One, HoloLens, and other platforms. In theory, these let developers create an app once that’s usable across multiple devices.

Of course, having these apps on the Microsoft Store also provides an additional revenue stream for Microsoft.
Because desktop Windows programs are available all over the place, downloading them can lead to infection of your computer. If you don’t download from a trusted source, it’s often difficult to tell whether an app you find on a random website is a legitimate download or a dangerous fake. This leads to inexperienced users opening themselves up to malware just from downloading software.
Instead, the Microsoft Store gives Microsoft more control over what apps are available. The company does some level of vetting to weed out dangerous apps from the Store. For some time the Store had issues with fake and dead apps, but these are thankfully not as bad nowadays.
As we’ve seen, Store apps have the advantage of living in a trusted environment. However, they’re also more secure at their core than desktop apps.
When you download a desktop app, it often requires permission to run as an administrator to install. While this is a normal part of installing software, providing admin rights to a program gives it permission to do whatever it wants to your computer.

If you grant admin privileges to a malicious app, it has free reign to install malware, trash your data, record your keystrokes, or otherwise do harm to your PC. Most apps don’t do this, of course, but this is how infections often spread.
In contrast, Store apps have limited permissions. They run in a sandbox, meaning they’re confined to a certain part of Windows. Since these apps don’t ever run as an administrator, they don’t have nearly as much potential to damage your system.
This is great even for apps like iTunes. By downloading the Store version of iTunes, you won’t get extra junk like Bonjour and Apple Software Update included along with it.
Like Android and iPhone apps, Microsoft Store apps also list out all the permissions they use. This lets you see exactly what functions they utilize in the background. In addition, you can block apps from using individual permissions in the Privacy section of Settings.

By default, Store apps all receive automatic updates. This is much easier than the update prompts most desktop apps provide, as you don’t have to worry about visiting the site and downloading the newest version manually. Uninstalling a Store app is also much cleaner than a desktop app, as there are no Registry entries and other scattered data to remove.
While there’s a wealth of great software available for Windows, you won’t find it all on the Microsoft Store. Developers must pay a small fee to register and get their apps on the Microsoft Store, which might not be worth it to creators of small tools.
A lot of popular apps, such as Discord, Steam, Calibre, Snagit, and many more are not available on the Store. This means gamers and users of power applications will have to stick to desktop apps in many cases.
However, you can also find Store versions for a lot of common desktop software. Slack, Spotify, iTunes, Messenger, WhatsApp, Telegram, and Evernote are just a few examples.

Many of the apps on the Microsoft store are mobile-style offerings like Netflix and Candy Crush Saga that are simple games or apps to access one website or service. However, even some small desktop utilities are available in a Store variant. This is the case with PureText, a great little app to paste text without formatting.
Fan-favorite image editing app Paint.NET is also available for a few dollars on the Store. It’s the same as the free version, but the developer offers it as an optional donation with more convenient updates.
The same app can vary quite a bit between versions. In general, desktop apps offer more features and navigation icons, while Store apps use larger, more spaced-out buttons. This makes Store apps more convenient for touchscreen use.
As an example, look at the version of OneNote included with Microsoft Office compared to the OneNote Store app. Below is the desktop version:

You can see that like other Office apps, this has tabs along the Ribbon for all sorts of features. These include advanced tools like revision history, the ability to record video, and all sorts of tags, plus support for macros. The buttons are also close together, as you’d expect for something designed for a mouse.
In comparison, here’s what the Store version of OneNote looks like:

You can see how simple the interface is here compared to the desktop version. It has fewer tabs and buttons with icons that are spread further apart. In addition, the Store version offers far fewer settings than its desktop counterpart.
As mentioned earlier, this feels more like an app you’d use on your phone than a desktop program. It’s perfectly suitable for quick use, but OneNote power users will find many features lacking.
Check out a closer look at OneNote’s version differences if you’re interested in more.
Let’s quickly look at VLC, the popular media player, to see how its desktop and Store editions differ.
The desktop edition has a wealth of features you’ve come to expect from the program. Along the bottom bar, you can control the playback, including adjusting both audio and video effects. Desktop VLC supports subtitles, the ability to open media from sources like network streams, on-screen control customization, and a whole lot more.

In comparison, the Store edition of VLC is much more streamlined. You can change options, but only a handful compared to everything in the desktop version. It still offers support for subtitles and playback from network sources but doesn’t let you customize the interface, play from a DVD or Blu-ray disc, or use a lot of VLC’s other hidden tricks.

You’ll also notice that the buttons in this version are much larger, making them easier for touchscreen users. As I was testing it, the Store version also froze up several times when trying to start a video.
The Store version is serviceable, but power users will find a lot lacking.
Aside from desktop app replacements, the Store contains many apps for web services. These include Pandora, Amazon, Netflix, Instagram, and others.
In some cases, these “apps” are simply a wrapper on a website (such as Amazon). There’s little reason to use these when you can just bookmark the site in your favorite browser.
However, others offer unique features or better layouts. For example, while you can scroll through Instagram in a browser, you need to use the Instagram Store app to access your DMs. You may also prefer to keep a desktop app for video services like Netflix and Hulu installed for easy access, especially if you often use your laptop in tablet mode.
Whether you should use a Store app or web app depends on your needs. Some people like having dedicated app s for services that they have open all the time, like Pandora, to cut down on browser tabs. Give both a try and see which you prefer.
After looking at both kinds of apps, there’s no clear winner between them. Most people will probably use a combination of both.
Desktop apps offer superior functionality, but can have more confusing layouts. Conversely, while Store apps are fairly stripped-down experiences, they update automatically and come from a trusted source.
If the apps you use offer both options, give them a try and see which fits your needs better. Need some ideas? We’ve rounded up the best apps in the Microsoft Store.
Read the full article: Desktop vs. Microsoft Store Apps: Which Should You Download?
https://ift.tt/2t9cAl1

When you start a new website, the first thing you need is a reputable web host. For WordPress sites, we highly recommend WP Engine, which handles all the hard work of site management for you. If you don’t mind getting your hands dirty, then InMotion Hosting and Bluehost are both viable options as well.
Next up, you might wonder: “How can I add a free chat room for my website?” To foster more real-time communication between users of your site or the readers of your blog, chat rooms can come in handy.
Fortunately, several free chat room services allow you to create your own room. They either provide a simple link to that room, or let you add that chat room to your site. Ready to start? Here are some of the best online chat rooms that you can easily add to your website.

Chatzy lets its users create public and private chat rooms. It provides a link to that room, which you can easily link to on a webpage or in an email. The site offers several ways to customize the chat experience to suit your needs. If you register on the site, you can view your Chatzy room list, making your chats easy to keep track of.
You can easily create a chat by selecting Start Quick Chat. After you input your name and subject, you can enter the room. Clicking Invite/Share on the left menu bar will provide you with a share link.
To embed a private chat room on your website, head to Hosted Rooms on the left menu bar. This page gives you instructions on how to customize your chat room, as well as how to embed the provided code into your site.

Tlk.io lets you simply start an online chat room, making it one of the best chat room sites like Chatzy. As soon as you enter the website, Tlk.io asks you to input a channel name, as well as your nickname. Clicking Join brings you to your very own chat room. Copy and paste the chat room’s URL in the address bar to place in emails or on your social media page.
To embed Tlk.io into your website, scroll down on the homepage until you see a button that says Get Embed Code. This option allows you to name your channel, choose a chat room height, and even pick a theme. Copy the generated code on the right side of the screen, and add it to your website to make a chat room in an instant. Tlk.io’s convenience can even make it a great team communication alternative to Slack.

To get started on Dead Simple Chat, you have to register for an account. After that, the site will direct you to your dashboard where it shows you the shareable link to your chat room, and also gives you the code to embed it on your website.
If you want to customize your chat room, click Chat Rooms on the left menu bar. Under the chat room of your choice, click Chatroom settings. You can then change the sidebar and background color of your chat room, as well as change its name. When you’re done, click Update Chat Room, and then hit Embed Chat Room to copy and paste the code into your webpage.
Dead Simple Chat also offers several paid plans. With the Pro Plan, you can have up to 2,000 different users, an unlimited amount of chat rooms, and storage for up to 180 days.
All of these perks prove that you don’t need the features of Facebook Messenger in order to communicate effectively.

Like Dead Simple Chat, Minnit also requires you to sign up in order to create a chat room. Once you create your account, navigate to the Quick Links dropdown menu, and click Create your own chatroom in less than a minute. Input your chat room name, description, and then decide if you want to make your chat private or public.
Minnit will then create your chat and will ask you which plan you want. The free plan offers unlimited messages, up to 40 users, and lets you censor certain words. If you decide to upgrade to one of the paid plans, you’ll get more customization options.
When you’re ready to embed your chat room into your site, head to the page of your chat room, and then select Embed Your Chat. If you have already set up a WordPress blog, you can use the Minnit plugin to add a chat room. You can also use the Wix plugin to add Minnit to your website, or you can simply copy and paste its code onto your own domain.

If you’ve tried embedding a chat room into your website in the past, you might remember ParaChat. Since ParaChat has closed, RumbleTalk serves as its alternative. You must register for an account before you create your chat room with RumbleTalk.
To customize your chat room, head to Design in the top menu bar. You can then insert a background image, edit text color, change your font, and even add a skin.
If you want to monetize your chat, RumbleTalk has settings for that as well. Head to Monetize on the top menu bar, and input your PayPal information. Rumbletalk also offers paid plans for an increased amount of chat seats and rooms.
When you’re ready to embed your chat room, click Embed on the top of the page. Select Get Code to copy and paste the code right on your website.

If you don’t know how to add a chat room to your website, Pure Chat will walk you through the steps. Create an account, and you can then access all of its helpful features. Its free live chat gives you plenty of customization options, allows you to transfer files, and even lets you have unlimited chat rooms. For more than three users, you’ll have to upgrade to one of Pure Chat’s paid plans.
After you register, Pure Chat will give you a code that lets you embed Pure Chat into your website. When you’re ready to chat, you can have conversations from your site, and from Pure Chat’s mobile app.
Embedding a chat room on your website doesn’t have to involve any complicated coding. In fact, it only requires you to install a widget, or simply copy and paste a code that the chat room creator generates for you. Choose one of these options from this online chat website list, and you’ll have a reliable way to communicate with your readers, customers, or your team.
Want to extend your conversations to your smartphone and your computer? Check out these messaging apps that you can use on your phone or computer.
Read the full article: 6 Ways to Add a Chat Room to Your Website
https://ift.tt/2Ps5MgW
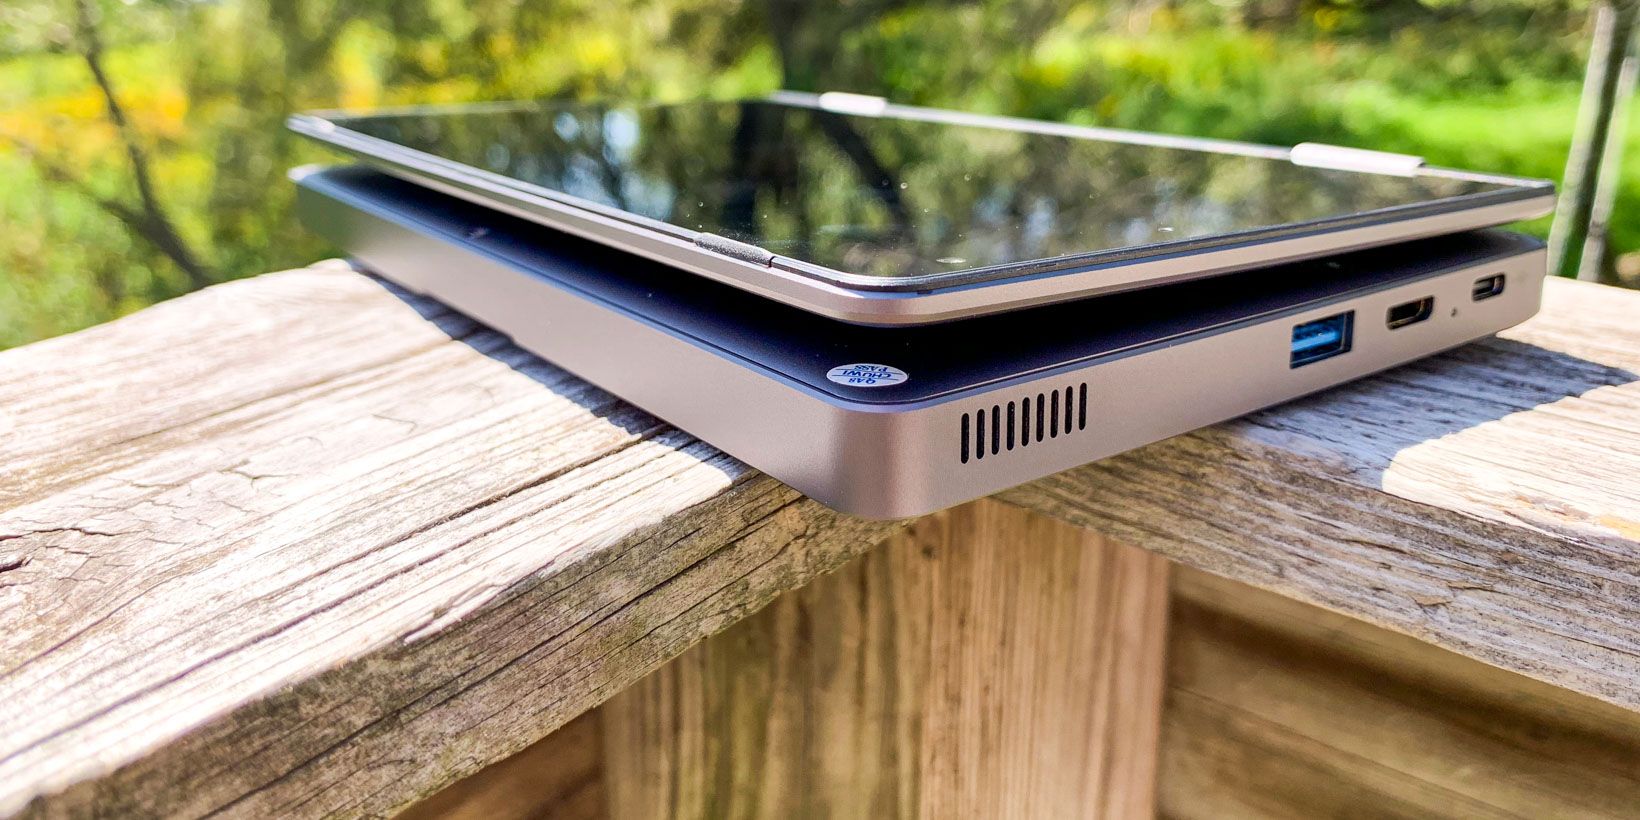
Netbooks didn’t last all that long the first time around. These cheap, portable devices weren’t supposed to be powerful, but they were incredibly affordable. Their deficiencies when it came to specs also meant they weren’t well suited to many computing use cases.
The rapid growth of popularity and power in phones and tablets sent netbooks to an early grave. Now we’re seeing a resurgence in the form factor, but there’s a difference. Models like the Chuwi MiniBook 8″ are far from underpowered, and this means they aren’t all that cheap either.
Based on the form factor, you may not expect much in terms of specifications. That’s partially true. This is no monster desktop replacement. That said, it’s in line with what you’d expect from larger laptops in the same price range.
The expandable storage is a nice touch, especially given the limited internal storage. If you’ve got a spare M.2 MSATA SSD lying around, you can easily double the available storage space.

The Chuwi MiniBook 8″ is small, and we’re talking seriously small. Before the review unit arrived, I knew I would be looking at a very small computer. I was still surprised by just how small it was when I took it out of the box. You can see the dimensions listed above, but the MiniBook may still surprise you when you see it in person.
Chuwi had to make some sacrifices to get the MiniBook as small as it is. Fortunately, not many of them seemed to affect performance. Instead, the MiniBook isn’t as sleek looking as some of Chuwi’s other models. After looking at the Chuwi SurBook Mini, this looks somewhat brutalist by comparison.
There’s a certain novelty to using the Chuwi MiniBook 8″ due to its small size. At times, the tiny computer just doesn’t seem like it should be able to manage the feats of computing it is achieving. This isn’t a toy, but sometimes you have to remind yourself of that fact.
That isn’t to say that the MiniBook is flimsy. The body is made of aluminum alloy which makes it both strong and lightweight. It’s also capable of pulling off some feats of gymnastics.
The MiniBook uses what Chuwi refers to as a 360-degree “Yoga” design. This means it can work as a standard laptop, in tent mode, or in presentation mode, just like larger 2-in-1 designs.

Given the 8-inch screen size, you might expect less than HD resolution. That isn’t the case. The Chuwi MiniBook 8″ has a resolution of 1920 x 1200, meaning that the display looks quite sharp, no matter how close you look.
The combination of screen size and resolution give the MiniBook a pixel density of 283dpi, well within what Apple would deem “Retina” if this was one of its computers. Of course, UI scaling in Windows means that everything can feel a little cramped, but it’s easy enough to get used to.
The colors are rich and well-represented on the display as well. The display is fairly bright, though you may have some difficulty using the MiniBook in direct sunlight. This has more to do with the glossy finish on the screen than brightness.
The touch screen supports 10-point multi-touch. Chuwi also sells a stylus to use with the display, though we didn’t have one handy so we weren’t able to test this.

I have a feeling the keyboard is going to be the make or break point for most people with the MiniBook 8″. It’s small, and there’s really no getting around that point. Some keys, like the Delete key, are almost absurdly small. On the other hand, it is backlit, which is nice.
I did start to get used to the keyboard after testing the MiniBook for a few days. The only problem is that once I felt comfortable typing on the MiniBook’s keyboard, there was a period of adjustment in going back to standard-size keyboards. I’m a touch typist, but if you aren’t you’ll likely have an easier time.
Fortunately, the keys you’ll use for the majority of your typing aren’t all that small. The Delete key, the split space bar, and the strange location of the Tab key are likely where you’ll run into the most trouble, assuming you do run into trouble.

The small size of the Chuwi MiniBook 8″ makes equipping it with a standard touchpad impossible. Instead, Chuwi decided to outfit the MiniBook with what it calls a Super Optical Finger Navigation Module.
In practice, this works like a combination of a tiny trackpad with the TrackPoint made famous by IBM ThinkPads. Like the keyboard, using this effectively requires some patience. Once you’ve gotten used to the concept, basic navigation is easy enough.
Even once you’re used to the navigation module though, it takes a while to feel natural. During my time testing the MiniBook, I never quite felt at home using this. I would have felt more at home using a standard TrackPoint, but that could just be me.
This would be much more of an issue if the MiniBook wasn’t equipped with a touch screen. This makes working with the system much easier and could be partially to blame for why I never got along with the navigation module.

Chuwi’s marketing around the MiniBook 8″ makes it clear that this computer should be able to serve as your only PC, should you wish it to. This is a clear difference from the netbooks of old. Those were best used for browsing the web, as the name implied. The MiniBook can do much more.
Our review unit uses the Intel Celeron N4100 processor, while the MiniBook is also available with a Core m3-8100Y. Even though we’re looking at the less powerful model, the computer rarely if ever felt sluggish during standard use.
One worry with smaller computers or even larger laptops is thermal throttling. Fortunately, the MiniBook is equipped with fans to help keep this issue at bay. These fans rarely spun up during normal use, and even with more hardware-intensive tasks, they were never intrusively loud.
Running GeekBench 4.4.1, the Chuwi MiniBook 8″ got a CPU score of 1812 for single-core performance and 5510 for multi-core. The GPU received a score of 9050. That’s higher than both the Chuwi Hi13 tablet and the 14.1-inch Lapbook.
The Chuwi MiniBook 8″ sent to me for testing arrived running Windows 10. Right now, that appears to be the only way you can order it. That said, an option on the box seems to indicate that Chuwi may one day sell the MiniBook preloaded with Linux.
If you’re inpatient or looking to dual-boot, you can always install Linux yourself. Early reports on the web look like you’ll encounter trouble with some distributions. The good news is that Chuwi has made a version of Ubuntu 18.04 available that works with the MiniBook 8″.

Chuwi equipped the MiniBook with a 26.6Whr battery. I routinely got around eight hours of use off of a charge, though this lowered somewhat when running benchmarks and other hardware-intensive apps. You may get more or less depending on your usage.
This 2-in-1 doesn’t seem to sip much power when the lid is closed. Given the mobile focus of the MiniBook, that’s handy. You shouldn’t need to worry about fully shutting the computer down to save power.
Another handy thing when it comes to mobility is how the MiniBook charges. It uses a standard USB-C plug for charging, with a 7.6V input for fast charging using the PD standard. This means you can easily top up the battery with a battery pack. Chuwi says the MiniBook supports anything above 12V.
When it comes to recharging the battery, the fast charging helps. From a completely drained battery, you can expect a recharge to take a little over three hours.

For most people, a single question can help you determine whether you should buy the Chuwi MiniBook 8″: How important is a small size for you? If mobility is your number one concern, getting used to the cramped keyboard and less-than-perfect mouse replacement won’t be a waste of your time.
That said, it may be tough to come to terms with the price. Considering the power that’s packed into its tiny frame, this computer isn’t overpriced. It just feels like it should cost less than it does, given the small size. Given the lower price of other Chuwi computers like the excellent 14.1-inch Lapbook, the price feels even more like an anomaly.
Don’t forget that this is a very capable computer, surprisingly so given the form factor. We’re talking about a computer the size of a large paperback novel that can easily run your day to day productivity applications. If you’ve been pining for the glory days of the netbook, this isn’t just the next best thing, it’s even better.
The Chuwi MiniBook 8″ is currently available as part of an Indiegogo campaign. The price is currently $434 for the N4100 model and $534 for the m3-8100Y model. Chuwi plans to begin shipping in September. Prices are set to rise in the future, so if you’re looking to get one of these, you may want to do so sooner rather than later.
Read the full article: Chuwi MiniBook 8: The Netbook Makes a Comeback?
https://ift.tt/2HzKVlc

If you’re searching for the perfect code editor, there’s a good chance that you’ve run into both Atom and Visual Studio Code. Sure, there are plenty of other editors, but these two are among the most talked about.
Atom has been around a while, but its popularity is flagging as of late. Visual Studio Code, once the new kid in town no one was quite sure about, now appears to be the hottest text editor around. That said, not everyone is so keen to move on from Atom.
To start, Visual Studio Code and Atom share DNA. Both of these editors use Electron, which lets developers create full-fledged desktop apps with web technologies like JavaScript, HTML, and CSS. Some people are vehemently opposed to this idea, but that is another story.
The two editors are also closer than you may think in another way. Atom was created at GitHub, while as the name may hint, Microsoft created Visual Studio Code. In 2018, Microsoft announced that it would acquire GitHub. While some initially worried that this meant the end of Atom, Microsoft clarified that both editors would continue to exist.
Visual Studio Code fans often point to its performance compared to Atom and other Electron-based apps. Electron apps have gained a reputation for sluggish performance and slow startup times across the board, but Visual Studio Code manages to avoid this.
The performance differences between Visual Studio Code and Atom come down to a few factors, but one major aspect is the approach with which each app is developed. Visual Studio Code has a tightly controlled core set of functionality, with plugins adding surface-level features.

Atom, on the other hand, uses a plugin-based approach to nearly everything. This approach has benefits, but also drawbacks. Atom is slightly slower out of the box, and this only gets worse when adding certain plugins.
VS Code has the clear advantage when it comes to performance, but neither editor is slow on a modern machine. This changes when you’re editing huge files. Visual Studio Code fares better than Atom, but either is noticeably slow when compared to an editor like Vim or even Sublime Text.
Visual Studio Code packs in more functionality out of the box than Atom or even many other text editors. It doesn’t quite have the features of an Integrated Development Environment (IDE), but it gets close. In addition to the standard text editor features, support for building and debugging apps is right there. So, of course, is Microsoft’s trademark IntelliSense autocompletion.

One feature popping up more often in modern text editors is Git integration. Again, Visual Studio Code also has this out of the box, letting you easily deal with version control without having to open a terminal window. Markdown support is also built-in, complete with preview functionality, so you can ensure your README.md file will look right on GitHub.
While Atom doesn’t have nearly the same amount of features on first launch, it does have Git integration. Atom even goes a step further, offering complete GitHub integration. This is almost expected, given the project’s origins, but it’s still handy, especially if you use GitHub for everything.

For the vast majority of functionality, however, Atom relies on plugins. These are easy to install from the app itself, letting you customize the editor in nearly any way you can think of.
Extensibility is where the largest difference between these two editors happens to lie. For Visual Studio Code, plugins add features. You can install themes, support for new languages, and build tools to help you when it comes to coding in Rust or Go, for example.
Atom, on the other hand, gives much more power to the plugins. As much of the editor’s functionality comes from built-in plugins, the right plugin can create an almost entirely new app. This makes Atom a much more “hackable” app. Atom even has a section in its manual aptly titled Hacking Atom.

This is somewhat similar to the days of the “editor wars” between Vim and Emacs. The sheer amount of functionality built into the latter led to some referring to Vim as an editor and Emacs as an operating system. Atom doesn’t reach the level of customizability seen in Emacs—nobody has written an Atom email client yet—but it gets closer than Visual Studio Code.
That isn’t to say that Visual Studio Code plugins don’t offer plenty of functionality. Look no further than our list of handy Visual Studio Code plugins for proof of that.
Both Visual Studio Code and Atom currently enjoy large communities and user bases. While Visual Studio Currently seems to be the more popular of the two, Atom still has a dedicated community of users and developers. If Microsoft decides to drop support for either editor, this may change, but that doesn’t seem like it will happen soon.

Atom seems to be embraced more by the open-source community than Visual Studio Code due to the Microsoft affiliation of the latter. That said, there is a community effort to create a Microsoft-free version of Visual Studio Code. Both editors are open source, but some users aren’t fond of the data collection used by either app.
Both Visual Studio Code and Atom are available completely free of charge. The Atom editor is available under the MIT license, while the Visual Studio Code download is under a proprietary license despite the editor’s open-source codebase. Both editors are available for macOS, Linux, and Windows.
Download: Atom (Free)
Download: Visual Studio Code (Free)
In a nutshell, Atom is a highly customizable text editor. With the right plugins, it can approach the functionality of an IDE. Visual Studio Code is similar, but with its feature set, it feels closer to an IDE right from the start. Neither of these has quite the features of a full IDE, however.
Are you unsure whether you should use a text editor or an IDE? Don’t worry, as we’ve already examined whether text editors or IDEs are better for programmers. You may not agree, but our take could help you make up your mind.
Read the full article: Visual Studio Code vs. Atom: Which Text Editor Is Right for You?
https://ift.tt/32geFeU
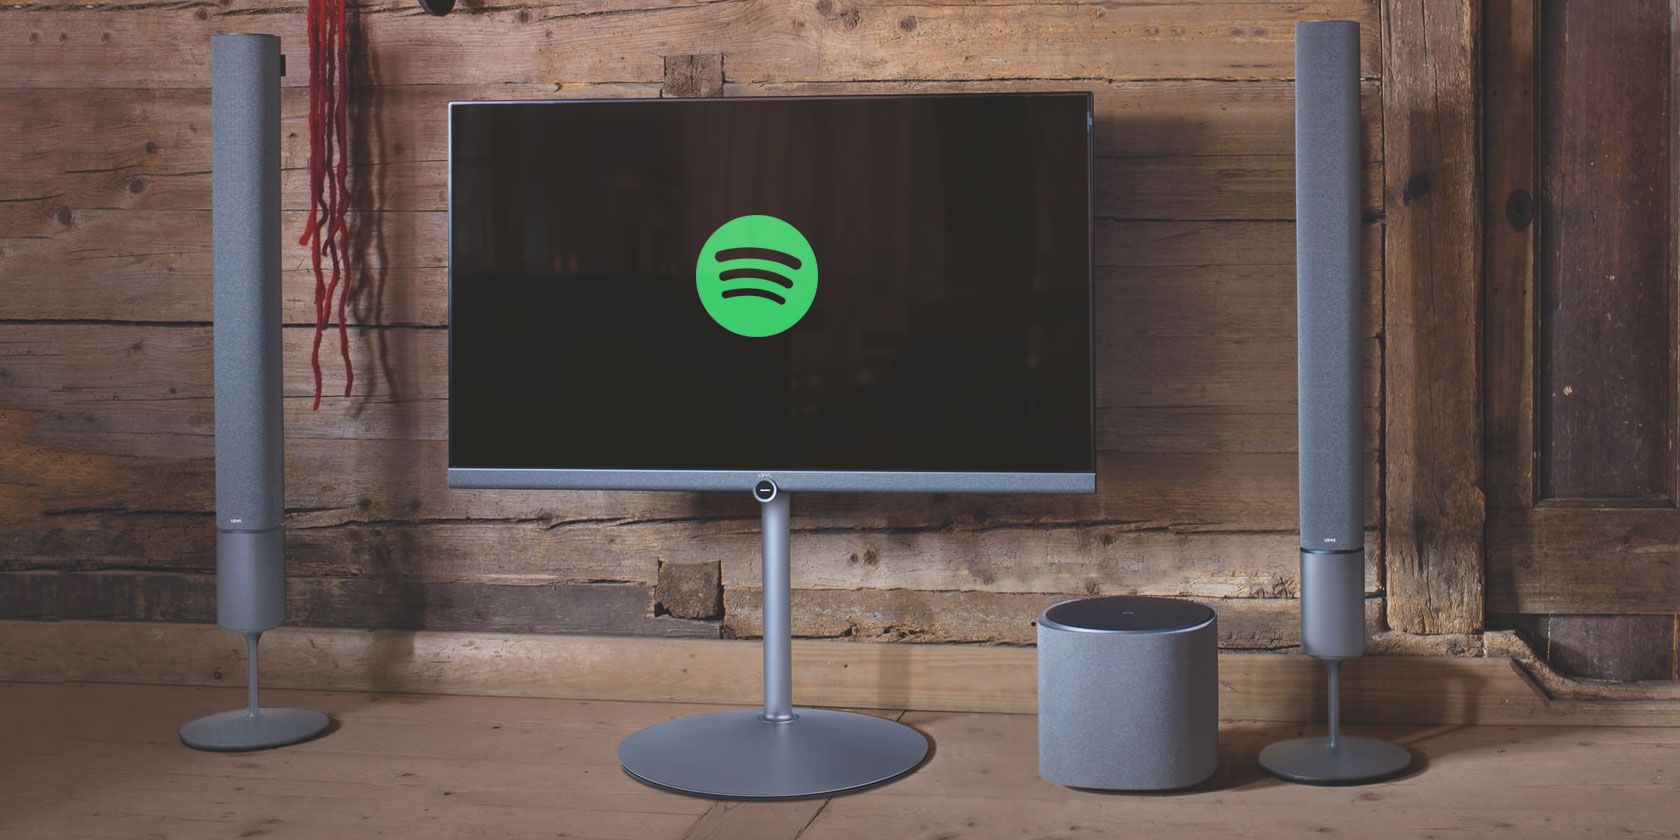
If you use Kodi, you probably already know how to listen to music files hosted on your hard drive. But what if you want to listen to Spotify on Kodi?
It’s actually really easy to stream music using the Spotify add-on for Kodi. And in this article we’ll show you how to listen to Spotify on Kodi.
To use the Spotify add-on for Kodi, you’ll need a premium Spotify account. (So you’ll have to decide whether Spotify Premium is worth its premium price.) And the add-on is created by a third party developer, so to install it we’ll first need to add a new repository called marcelveldt to Kodi.

To add the new repository to your Kodi installation, first you need to download it as a zip file. To download the repository, navigate to the Marcelveldt repository on Github in your web browser. Then, right-click the .zip file and choose Save Link As…. Save the zip file to a convenient location such as your desktop.
Now, open up Kodi. From the home screen go to Add-ons in the left-hand menu, then click the icon on the left that looks like an open box. Then select Install from zip file.
In the popup box, navigate to the location where you saved the zip file. Select the zip file and click OK. This will install the repository and you’ll see a notification that it’s ready to use.

With the repository added to Kodi, now we can install the add-on. Do this by starting at the Kodi home screen once again, and clicking on Add-ons from the left hand menu. Click the icon of the open box.
Now choose Install from repository. Find the option for Marcelveldt’s BETA repository in the list and click on it. Now select Music add-ons.
Click on Spotify from the list and then hit Install in the menu at the bottom of the popup. This will install the add-on to your Kodi system.

While we’re here, we’re going to configure the add-on as well. In the same menu where you installed the add-on from, click Configure.
This brings up a popup where you can add your Spotify username and password. Hit Username to add your Spotify username (the email address you use to access Spotify) and hit Password to enter your password. Save these options by hitting OK.
If you want to use multiple Spotify accounts with the Kodi add-on, this is also possible. Toggle the option for Enable support for multiple accounts to enabled and you’ll be able to add multiple usernames and passwords.

Now you’re ready to use the add-on to listen to Spotify. To open the add-on, start on your Kodi home screen. Then go to Add-ons from the menu on the left and select Music add-ons. From here, click on Spotify to launch the add-on.
In the main menu of the add-on you’ll see three menu options: My Music, Search, and Explore, plus information about the current playback device and the currently logged in user. To start playing your Spotify music, go to My Music.
Here you can pick from options including Artists, Albums, and Songs. Navigate to the track or album you want to play and click on the title of a song to start playing it through Kodi.
As well as playing your existing music through Kodi, the Spotify add-on can also perform a bunch of other functions too. Here are some tips on using the Kodi add-on.
One of Spotify’s handy features is Spotify Connect, which lets you use your phone as a Spotify remote. And you can use Spotify Connect with the Kodi add-on as well.
When you have the Spotify add-on open in Kodi, open Spotify on your phone or on another device. You should see a notification in the now playing section of your phone saying Devices available. Tap the icon that looks like a speaker in front of a monitor and select Kodi [your PC name] to connect to Kodi.
Now you can use your phone or other device to play and queue up tracks to play through Kodi. This is a great way to control music at a party or when you have friends over at your house.
Alternatively, you can also do the opposite: send songs from Kodi to your phone. To do this, start at the Spotify add-on menu and choose Playback device: Local playback on this device. In this menu you can see all the devices you have connected to Spotify. Click the name of a device to start playing music there instead.
As well as playing artists and albums, you can also access all your Spotify playlists. In the add-on main, go to My Music and then to Playlists. Here you can see all of your user-created playlists.
Click on any track to begin playing the playlist through Kodi.

One of the great things about Spotify is the ability to discover new music, and you can do this through the Spotify add-on for Kodi as well. Start off on the add-on home screen and then select Explore.
This takes you to a menu with options to browse through various genres, top lists, and new releases. The Top Lists section includes playlists like the current Global Top 50 or the Global Viral 50 where you can see which songs are being most played by other users around the world.
There’s also a Featured playlists option where you’ll find all the Spotify-created playlists like Music for concentration or Your Coffee Break. Like the user-created playlists, click on a title to view the tracks and click on a track to begin playback.
Finally, you can also search for a specific artist, album, or track through the add-on. To do this, select Search from the add-on’s main menu and enter your search term into the text box. You’ll then see results sorted into artists, albums, playlists, and songs. Click one of these options to see the search results, and from the list of results select the item you’re looking for.
From here you can click on the name of a track to begin playback.
With this Spotify add-on for Kodi you can listen to all your Spotify music through Kodi, as well as discover new artists and new music. And when you’ve had your fill of Spotify, here are the best Kodi add-ons to install today.
Read the full article: How to Listen to Spotify on Kodi
https://ift.tt/2HzKTK6

You’ve heard about building your own PC, but can you build a laptop from scratch? The trouble with laptops is that the components don’t adhere to any definitive standards. Consequently, the nearest you’ll get to building a laptop is upgrading the RAM and maybe the storage.
But with the help of specific hardware, kit computers, and 3D printing, it’s possible to build your own notebook computer. These six laptop building kits and project ideas will get you started.
So many Raspberry Pi laptop project kits are around, but which one is best? We reckon it’s the Pi-top, a modular laptop with a retractable keyboard panel. It’s here that you place your Raspberry Pi, attach it to the Pi-top’s connection module, and start using the computer.
Designed for portable productivity as much as experimenting with the Raspberry Pi, the rail mounting system supports extra hardware. There’s also a cooling bridge to enable you to overclock your Pi for improved performance without overheating. The end result is an easy-to-carry Raspberry Pi experience, capable of running any project you can throw at it.
This isn’t the only Raspberry Pi laptop available. See our guide to Raspberry Pi laptops for more project ideas using the popular little PCB.
A truly DIY project, this homemade notebook project relies on you owning a 10-inch tablet and a keyboard. Oh, you’ll also need plenty of cardboard, decent knife, and a good supply of glue.
When cutting the card, take the time to plan out everything in advance. After all, the chances are you don’t have the exact same model of tablet and keyboard. Things will need to be adjusted, even if it’s only slightly. With a bit of care, you could replicate this project with any old tablet—the thinner, the better!
It is easy to laugh, but there is something ingenious about this project. The care that has gone into the design is clear and relying on an old tablet is inspired. Sure, you’ll need a keyboard and mouse, but for a DIY laptop, this is better than most actual notebooks.
Looking for more cardboard projects? Check our collection of DIY Google cardboard headsets.
For a truly compact DIY laptop solution, try this project which utilises a compact LattePanda computer. You’ll also need the affordable IPS LattePanda display for this DIY notebook which runs Windows 10.
A standard wireless keyboard and mouse combi is also used in the design, the bulk of which relies on an impressive 3D printed case. You can find the STL files for printing in the developer’s Thingiverse page.
By the end of the build, you should have a pocketable Windows 10 computer, smaller than a notebook. This might not be what you’re looking for in a DIY laptop project, but you’ll agree it’s impressive.
Following the tear-down of the comparatively slimline Xbox One S, YouTuber Ben Heck had the parts just laying around. His solution? To convert the Xbox One S into a portable gaming machine—an Xbox laptop, essentially.
Taking the motherboard, Blu-ray drive, PSU, and hard disk drive, the laptop features a 15-inch display, and machined aluminum base.
The project video is lengthy, but you’ll see how Heck made some interesting design choices and moved components around. Also, find out if the finished product is good enough for gaming. Of course, you can’t type on it; there are no Xbox word processing apps.
As a productivity device, this is a massive fail—but as a gaming laptop, it’s the ultimate.
For a less complicated gaming laptop that has a keyboard, try this DIY laptop project.
Relying on affordable components from Amazon (or your preferred hardware retailer), the secret to this project is the case. Barebones laptop cases can be purchased online, featuring just the display, keyboard, motherboard, and CPU/GPU. These can be bought as-is, or with the chosen customizations added by the retailer.
This project takes the barebones case and makes some improved component suggestions. The result is a DIY laptop project with high speed RAM, fast SSD storage, and m.2 SSD for the OS. Of course, you can make your own customizations, based on your budget.
Various online retailers ship barebones laptops. One example is RJTech.com, where you’ll find a nice selection of barebones notebooks for all budgets.
Ever broken a laptop and found yourself short of options? When the case itself breaks, it can seem like the end of the world. This is particularly frustrating if it is the lid—you’re suddenly unable to use a perfectly good computer.
One answer is to sell the laptop. Another is to find a new home for it. But you’re unlikely to find a case to precisely fit your hardware components. So, what is the answer?
Well, why not consider a pizza box?
Admittedly a somewhat amusing option, this pizza box laptop has two interesting qualities:
That second point is important, as it can inform your own future DIY laptop project. With any computer, the position of the components is paramount. In a notebook computer, more so.
Whether you choose to construct your laptop out of a new or old pizza box or something else entirely, the principle is simple: make it better than this.
It’s incredible, but when you see the evidence with your own eyes, building your own laptop suddenly becomes achievable.
With a wealth of options from Raspberry Pi to pizza box, you’ll probably find that a guided DIY laptop project is the smart choice. To recap, we looked at six DIY laptop projects:
Discouraged by the limited options for DIY laptop projects? Don’t worry—you can always build your own PC instead.
Image Credit: golubovy/Depositphotos
Read the full article: 6 DIY Laptop Kits and Projects to Build Your Own Notebook
https://ift.tt/32kHdEh
Vivo has been pretty aggressive in India with multiple launches this year. Vivo is also now the third largest brand in India with great YoY sales. Vivo recently announced the new series called Z series and the first smartphone is the Z1 Pro. Now, the company is gearing up to launch the next phone, the Vivo Z1x. The Vivo Z1x is basically the Vivo Z5 announced in China. So what are the features to expect? Let’s find out in this post.
While the Vivo Z1 Pro had an IPS LCD display which had Full HD+ screen resolution, the new launch Vivo z1x is having a Super AMOLED display. This means that the colors are vibrant, sharp and has great viewing angles too. The overall display quality is very good on the phone.
One of the most important aspects to look for is the camera and the Sony’s IMX586 sensor has been making a lot of buzz. The new Vivo Z1x has the Sony IMX582 sensor which is almost as good as the Sony IMX586 sensor. Apart from this sensor, the phone also comes with 8MP wide angle camera and a third depth sensor camera. The front camera is a 32MP shooter capable of good selfie experience. Here are some samples taken with the device.


While the Vivo Z1 pro came with 5000mAh battery and 18W fast charging, the Z1x has 22.5W fast charging along with 4500mAh battery. We expect the battery life to the really good with the device.
The Vivo Z1X probably comes with the fastest in- display fingerprint scanner and it words very well and probably one of the fastest we have seen in the sub 20k price segment.
The Vivo Z1x packs the same processor as that of Vivo Z1 pro, the Snapdragon 712. But here it has 6GB of RAM by default. Snapdragon 712 is a pretty good mid-range processor which we have seen on Z1 Pro as well. It does pretty good job even in gaming as well.
The post 5 Features to look for in Vivo Z1x (Vivo Z5) appeared first on .


